The recent launch of Google Pixel 3 has prompted developers to figure out how to root the device. Now that the device is finally being shipped to customers it is high time that we look into How To Root Google Pixel 3 and pixel 3 XL. Just recently we did an article where we showed you how to unlock the bootloader on your Pixel 3 device. Make sure to read that article as it is an important preliminary step to rooting.
Tutorial: How To Root Google Pixel 3 and pixel 3 XL
As we mentioned in the aforementioned article that TWRP recovery is not yet available for Pixel 3 devices. Since we will be using Magisk to root our Pixel 3 and Pixel 3 XL, we cannot simply flash it from recovery. However, the good news is we can manually flash Magisk using Pixel 3’s bootloader.
Requirements:
- Stock Boot image
- A Pixel 3 or Pixel 3 XL device.
- A PC/Laptop
- At least 60 % charge in your device.
- An unlocked Bootloader on your Pixel 3.
- A USB Cable
Download Stock Boot image for your Pixel 3.
Let us start with getting the Stock boot image for your Pixel 3. Since we know that Magisk works by modifying the stock bootloader image and it does that when you flash it from TWRP. hence, you will need the stock boot image for your device first and it can be found in your device’s firmware archive.
Step 1- Go to Google’s firmware download page
Step 2- Download the appropriate firmware. You can find the links to the latest Sept 2018 version of the firmware below.
- Pixel 3 – 9.0.0 (PD1A.180720.030, Sep 2018), 9.0.0 (PD1A.180720.031, Sep 2018, Verizon)
- Pixel 3 XL – 9.0.0 (PD1A.180720.030, Sep 2018), 9.0.0 (PD1A.180720.030, Sep 2018, Verizon)
Step 3- Once you have downloaded the firmware, extract the downloaded file to a new folder.
Step 4- When the file is extracted into a folder, open that folder and you will find another folder inside. Open this folder and inside of it you will find a zip file starting with the name “image-crosshatch” or “image-blueline”.
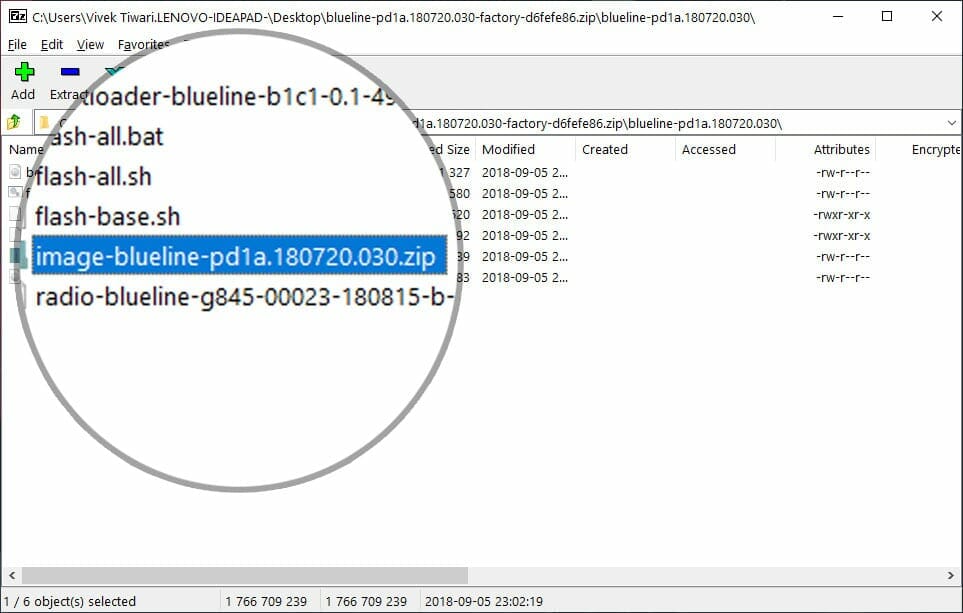
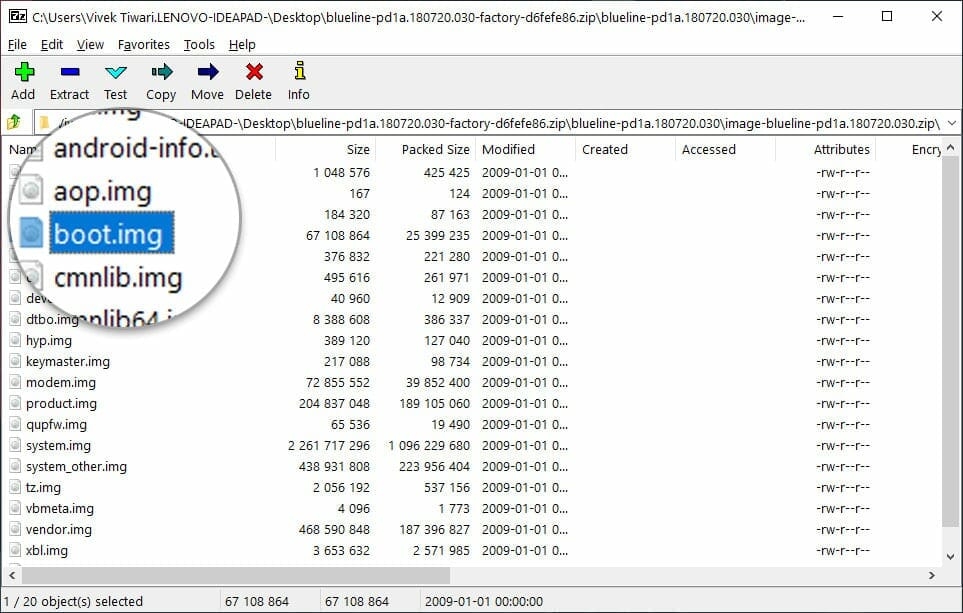
Step 5- Extract this zip file into a new folder. inside you will find several .img files (Image files) along with a file named boot.img. Boot.img is the stock bootloader image we are looking for.
Step 6- Copy this boot.img file to your device’s internal memory.
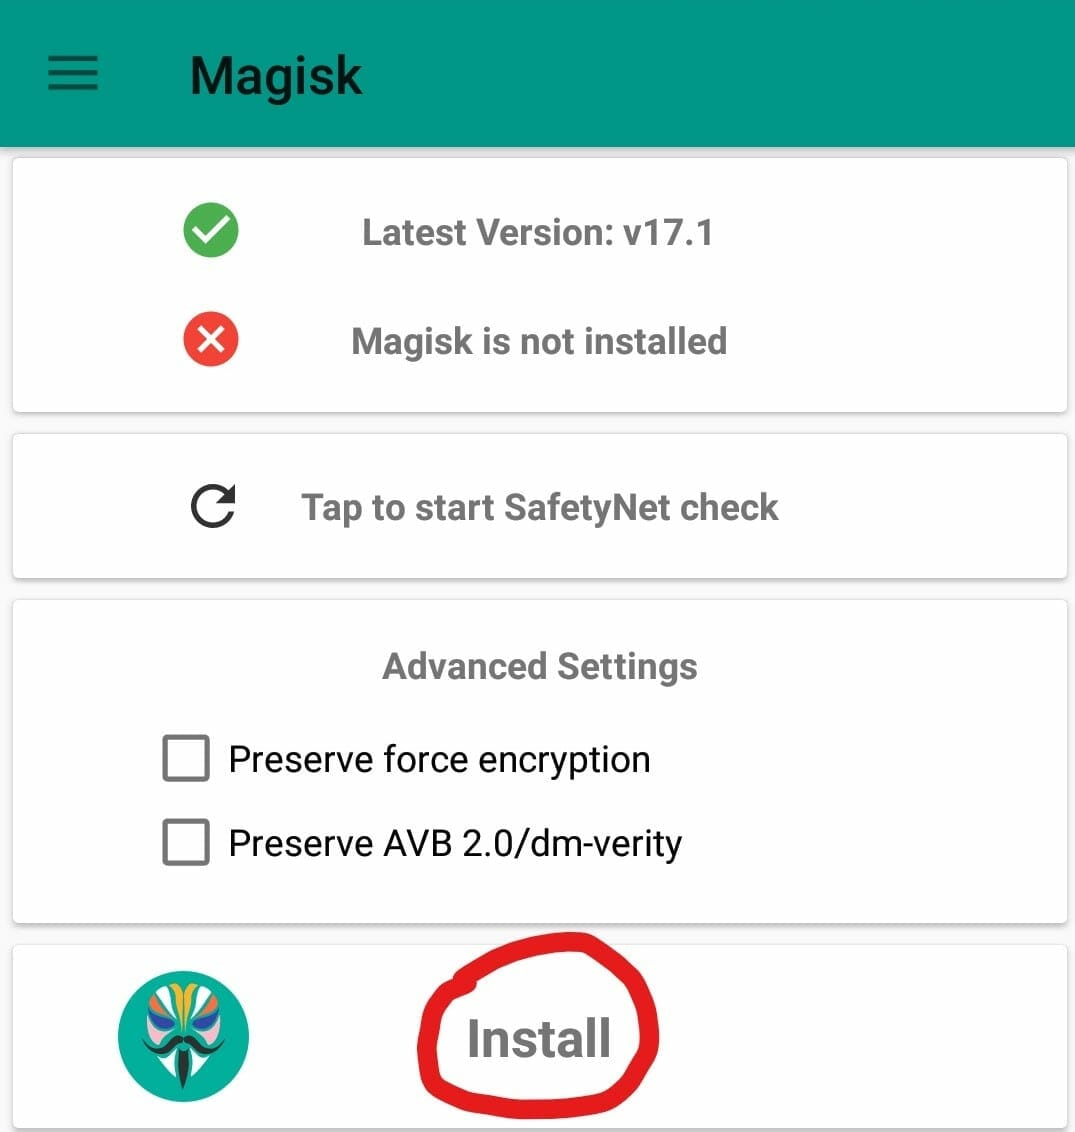
Step 7-Download and install Latest Magisk manager beta from here.
Step 8- Launch the Magisk manager app and go to its settings. Tap on “Update channel” and select “Beta”.
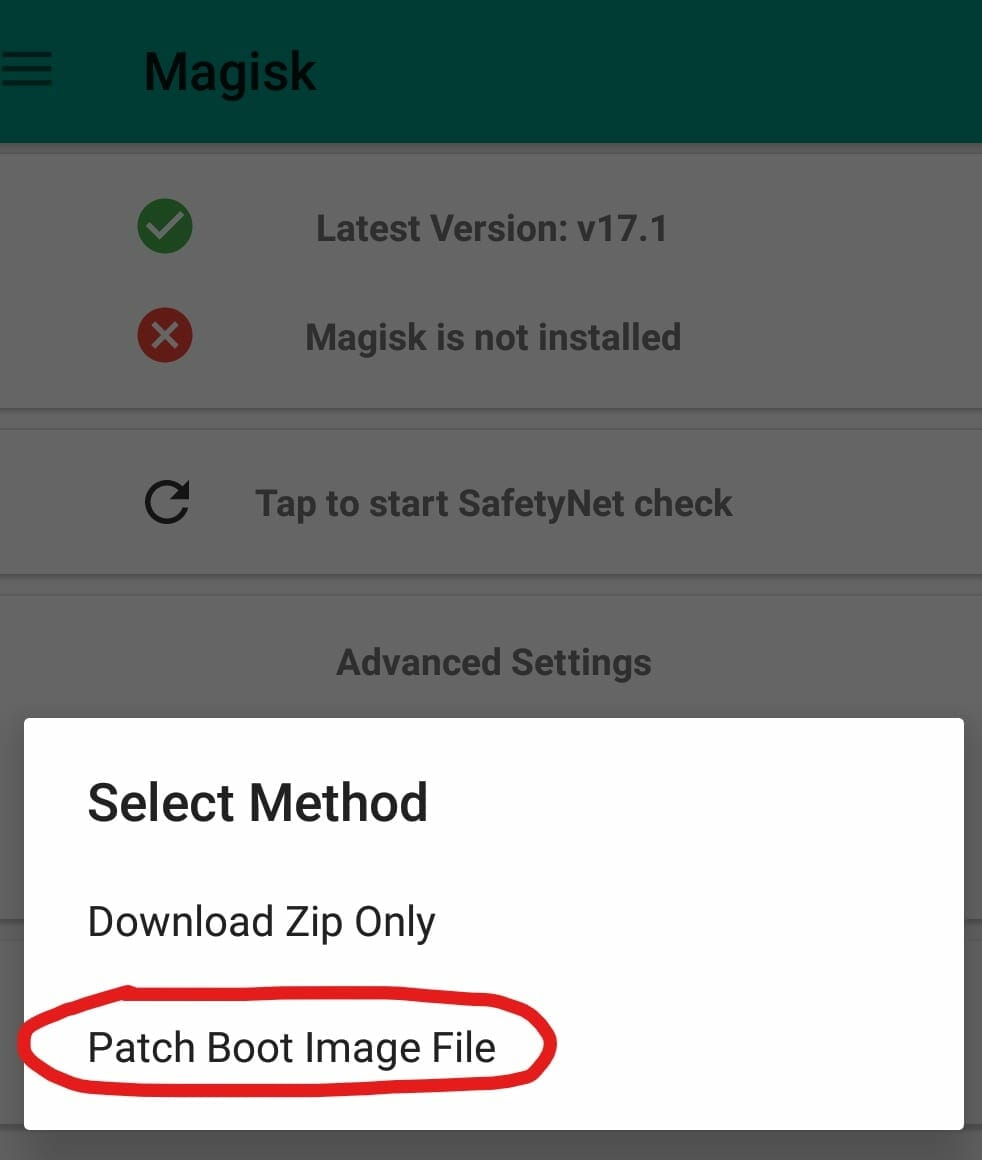
Step 9- Now go back to Magisk manager main screen and tap Install. Then again install and then tap “patch Boot image file”.
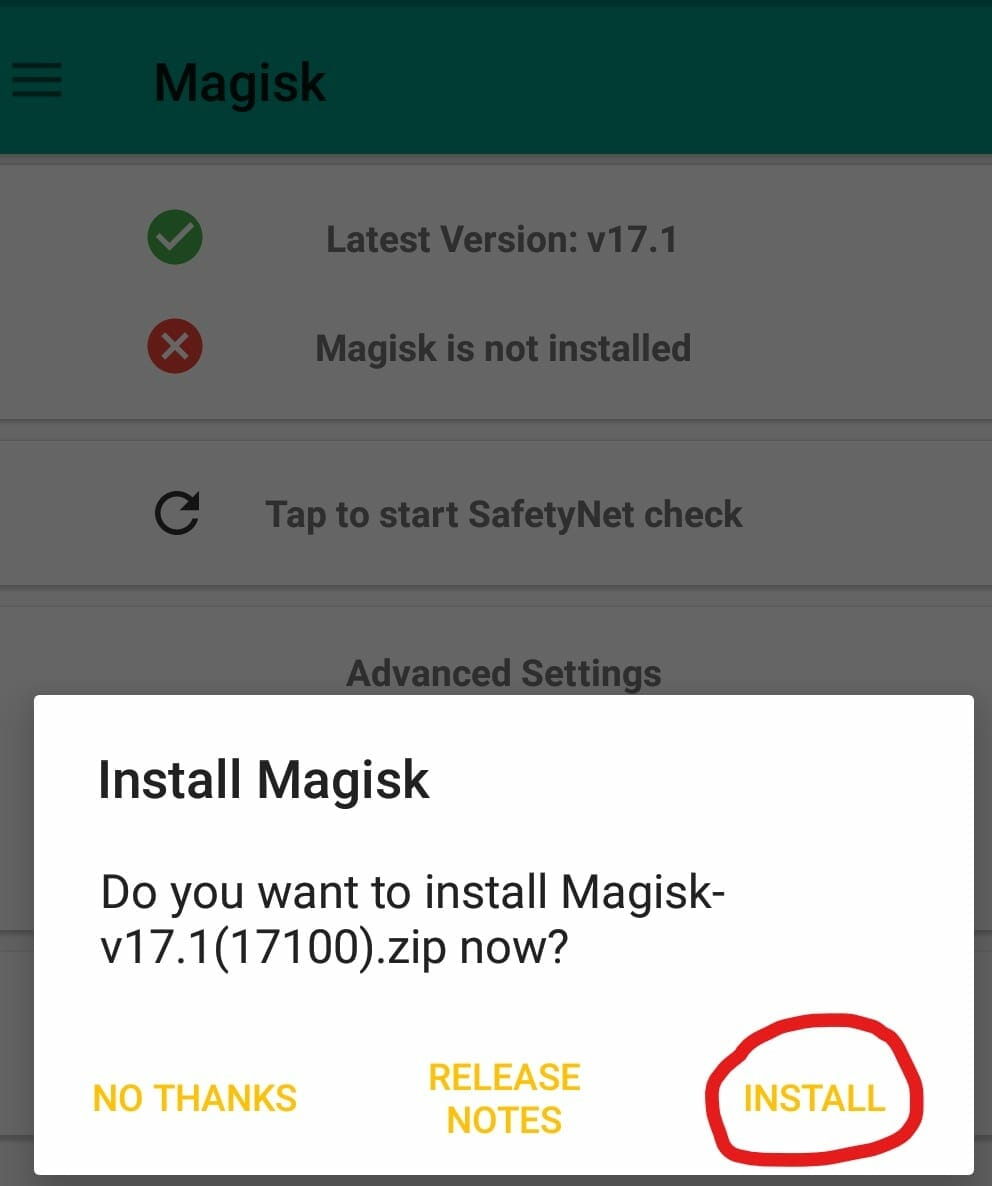
Step 10- Now navigate to the boot.img file that you transferred to your device internal storage earlier.
Step 11- Magisk will now patch the file and when the process is complete, it will save the file as “patched_boot.img” in your downloads folder.
Root Google Pixel 3 and Pixel 3 XL
Assuming that you did everything correctly above and that you have an unlocked bootloader. We can now move onto the actual rooting process which is very simple.
Step 1- Transfer the patched boot image file from your Downloads folder to the “adb folder” on your PC.
If you don’t know what I am talking about here then you need to go through this.
Step 2- Make sure your phone is connected to your computer via USB cable. Use the following adb command to reboot it into bootloader mode.
adb reboot bootoader
Step 3- Now you will flash the patched boot image file to your device with the following command.
fastboot flash boot patched_boot.imgAnd there you have it, simply reboot your Pixel 3 or Pixel 3 XL and you now have rooted device.
Let us know in the comments if theis guide helped or if you have any questions. Thanks for reading!