Hello Guys! Today we will be dealing with Application Bar Menu Items. You will see some application like emailing apps that contain below some of the option like to forward the mail or share it on Social Circle and etc. Below that you would find some other options too and those options can be added from Menu Items.
Let’s get started with Application Bar Menu Items:
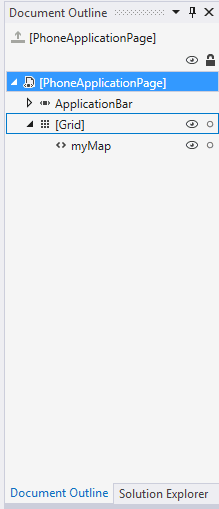
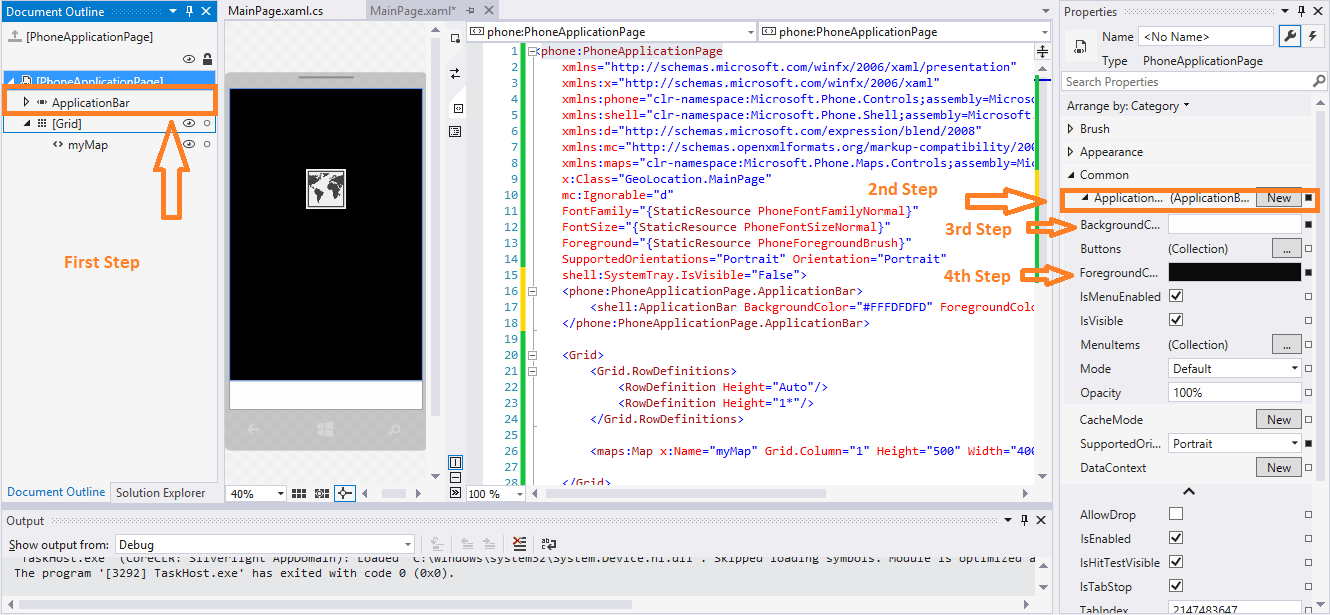
- First of all Click the Document Outline tab that is present beside the Solution Explorer tab. If you can find the Document Outline tab press CTRL + ALT + T and you will see a new Windows will pop up which is named as Document Outline.

- After that Click on Application Bar go to its properties. There you will see a Tab as Application click it. Change the background to White and foreground to black.

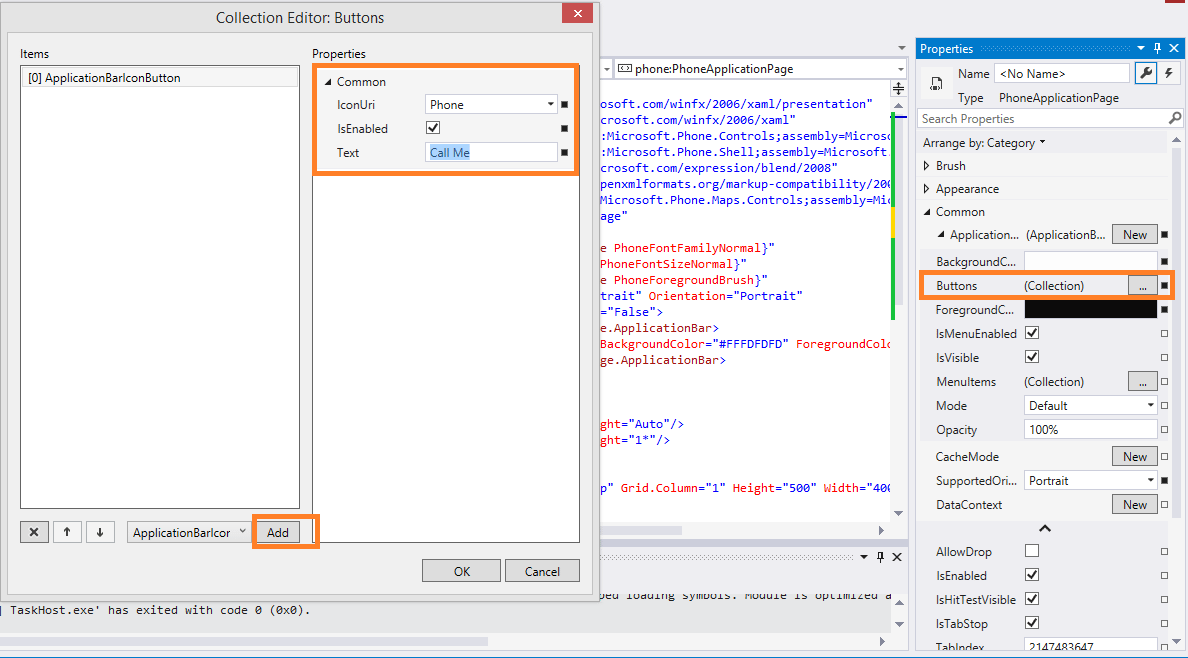
- Click on the Button menu that is on the right and then a new Windows will pop up. Click Add select IconUri select the desire icon and then name it.

- This was a way to add a Application Bar now lets see how to add Menu Bar.
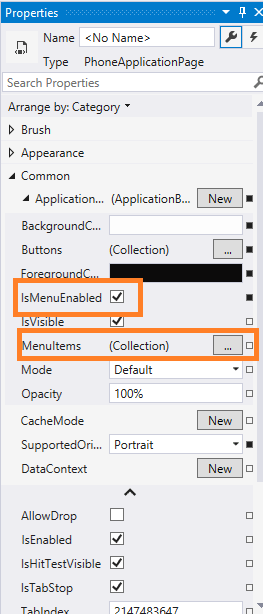
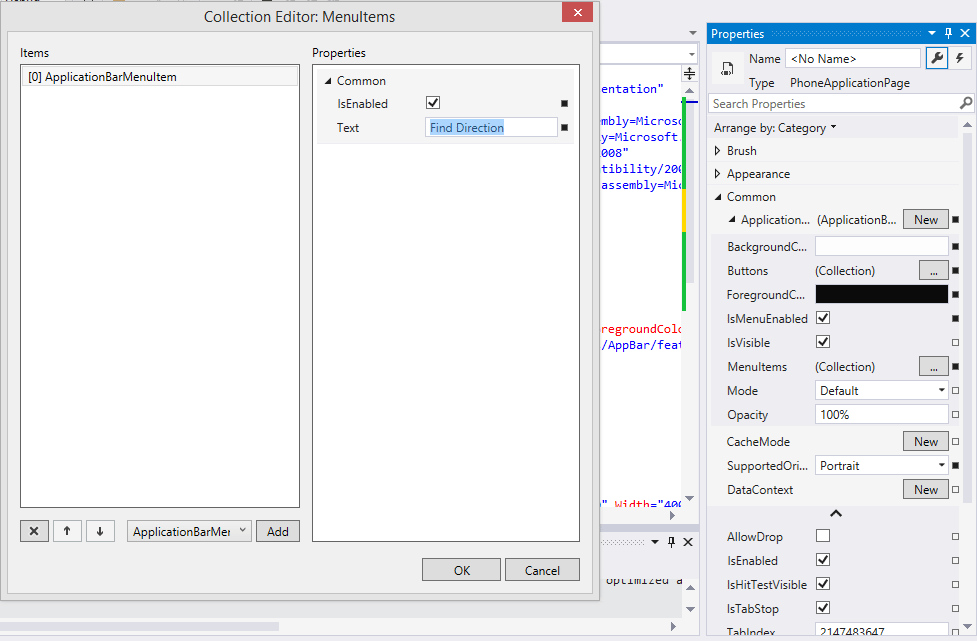
- Be on the same properties menu and below button where we clicked to add button on Application bar you will find Menu Items. And don’t forget to tick check the IsMenuEnabled checkbox.

- After that click on the Menu Item and add a Menu Item option.

- Here you will notice you just have to add text and that’s all
- I have created in this case two Menu Items that is Find Directions and the other one is Locate Me.
- As you will add these things you will be able to see xaml generating automatically on MainPage.xaml Page.
- What if you want to add Click events for both Button and Menu Items?
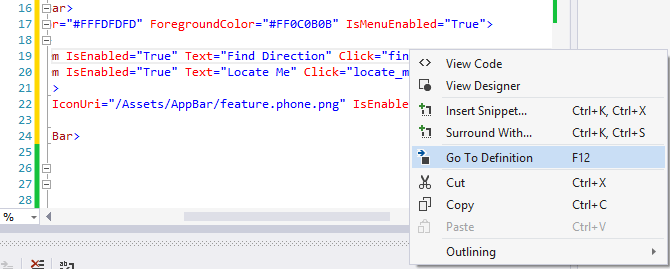
- That not a problem treat it like a button, go on its xaml and just write click and add event to it.

- Now the last thing you have to do is place your cursor on the name of event. Right Click it and Go to Definition. With this you event handler would be created. Or you can place the mouse and press F12.


