Steam’s new UI overhaul was shown by Valve a few months ago, and as we approach its official implementation, we already have a glimpse of what the library will look like. We’ll walk you through how exactly you can enable the Steam Library New Design on windows.
Enable Steam Library New Design on Windows
The method is fairly straightforward but you have to follow each step exactly as it is mentioned here, otherwise, you’ll run into some error.
- Head over to your Steam>Settings>Account>Beta Participation
- Allow beta participation
- Exit Steam
- Download the zip file from this link.
- Remove everything after the .zip from the file’s name, and make sure you can edit file extensions.
- Extract the steamui folder into your root Steam directory, which is normally
- Allow all the files to be replaced with the ones in the zip file
- Create a shortcut of said Steam.exe
- Right-click the shortcut and click properties
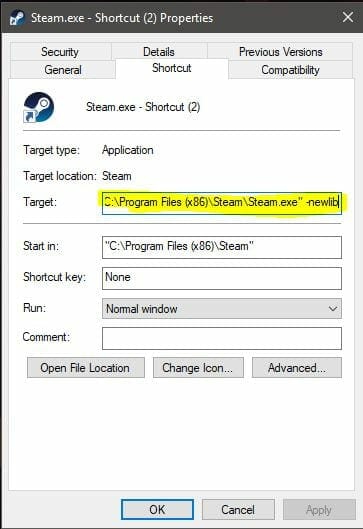
- Then in the Target box, put your cursor at the end of the line of text and press space then paste in -newlib, like this

- Apply and press Okay
- Use this shortcut to launch Steam, and that’s pretty much it.
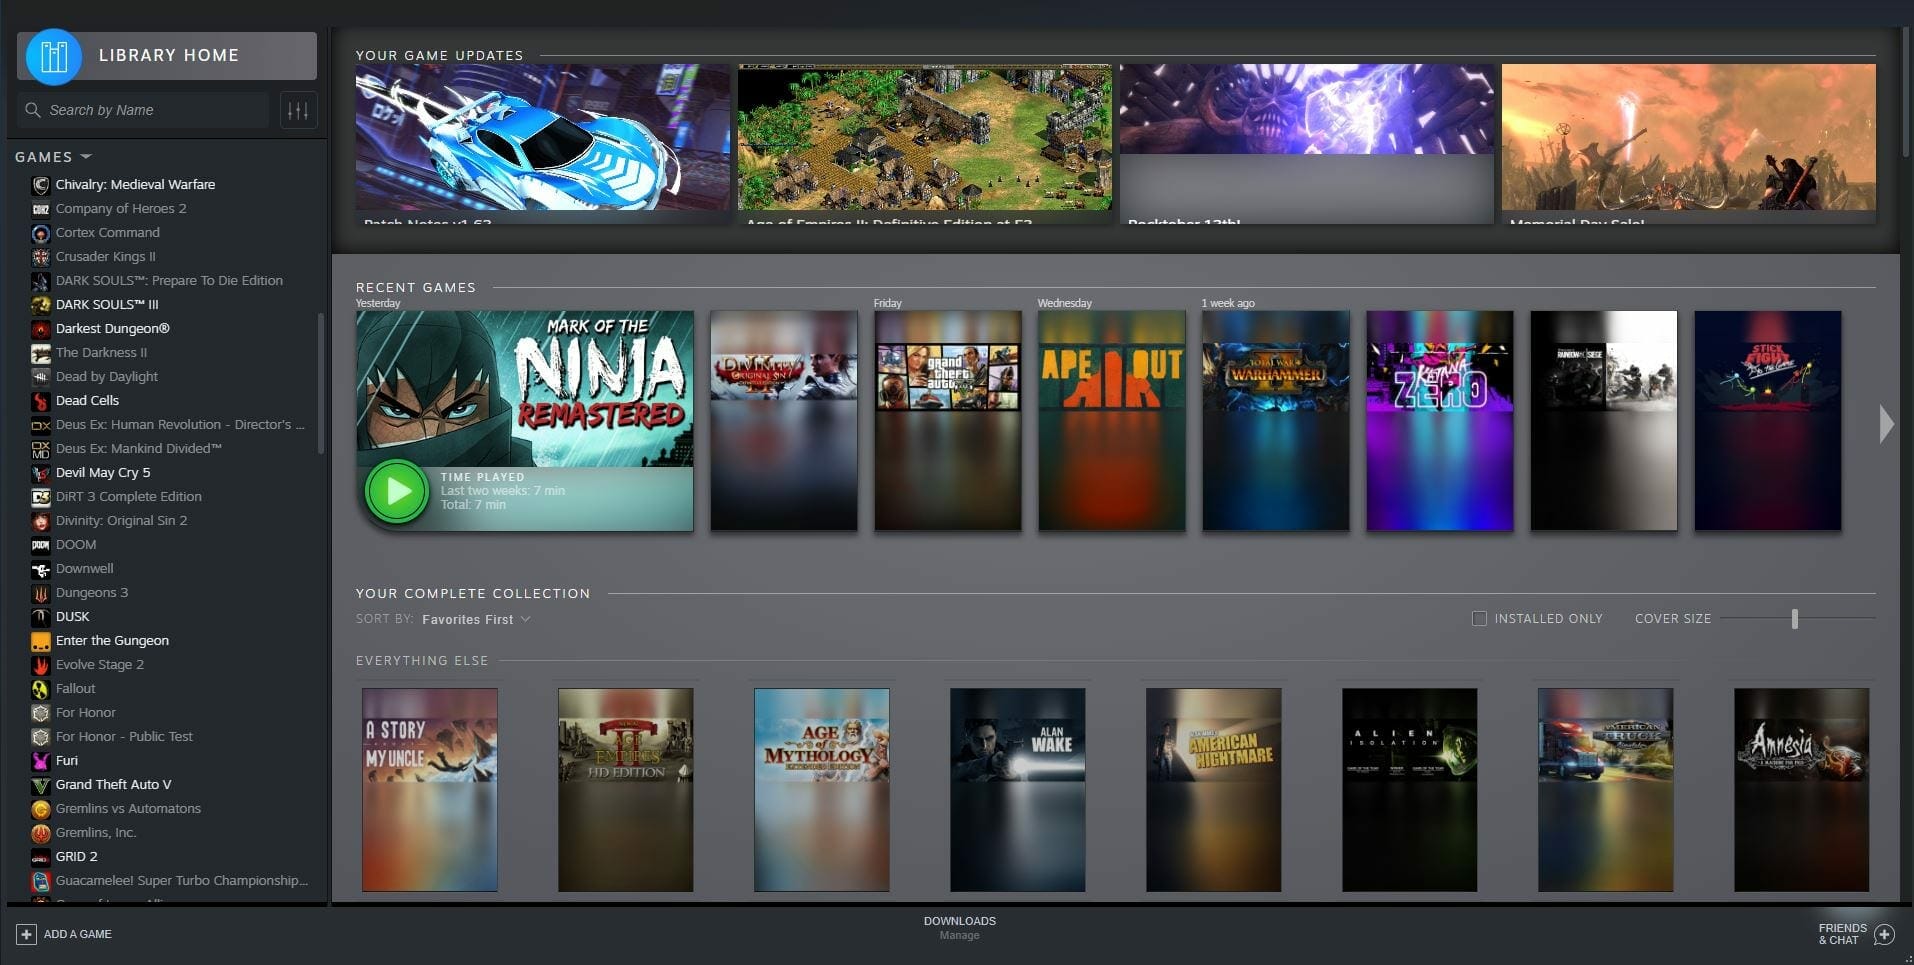
After you’re done these steps, you’ll get the updated library which should look something like this


I’m not going to lie, I actually kind of prefer the original design, and this will get some time getting used, and since it’s in Beta and all, we’ll see tons of changes over time, and hopefully based on user feedback. We’re not sure when exactly Valve will officially deploy the new UI, but this is your best bet till then.
Did this guide help you? Are you able to use the new Steam library design? Let us know in the comments below and share your thoughts.

