

CEMU 1.19.0d is the latest version of the popular Wii U Emulator, CEMU. It’s been a while since we wrote a detailed guide on how new users can start emulating and playing titles like Breath of the Wild, and Mario Kart 8. This guide will go over how you can setup CEMU 1.19.0d, with Vulkan API, and attain optimized performance.
This will be a step by step guide and explain everything you will need to do to get CEMU running. We will be sharing more guides that explain more features as well. Thankfully, setting up an emulator isn’t that hard anymore, and anyone can follow this guide.
How to Setup CEMU 1.19.0d
Before we begin, you will need to download the following files.
- CEMU 1.19.0d (Latest version of CEMU)
- CEMU Hook
- Winrar (Download and install for extraction)
Now, we can get started, and the first part is setting up your CEMU for the first time.
First Time Setup
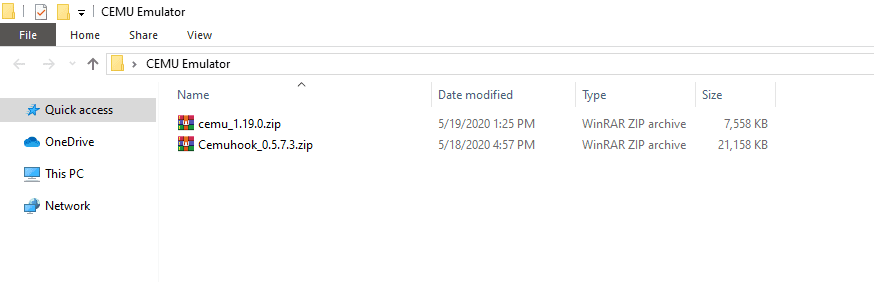
- After you have downloaded both files, create a new folder on your desktop or inside a drive. You can rename it to anything, but for sake of clarity, we will go with CEMU Emulator, as shown below.


- Drag both Cemuhook_0.5.7.3 and cemu_1.19.0 zip files into the main CEMU Emulator folder, like this.

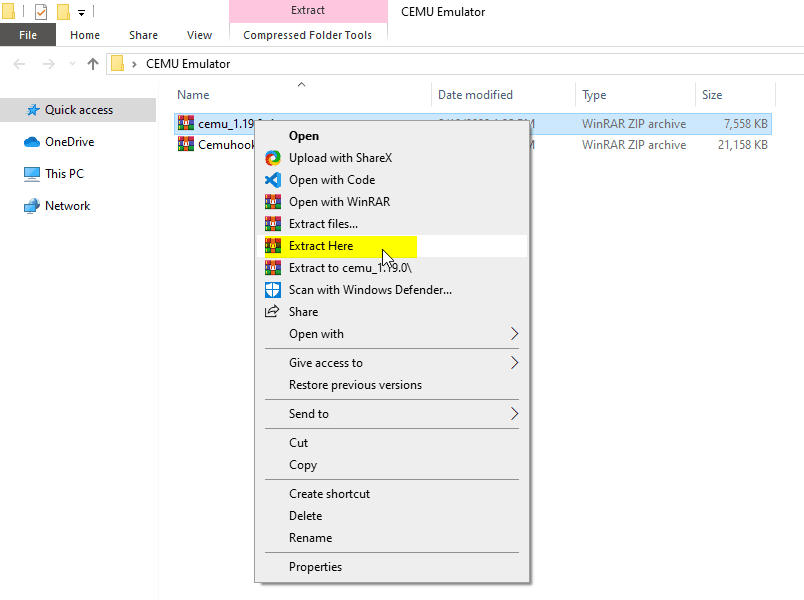
- Extract both of these here, using Winrar or 7zip

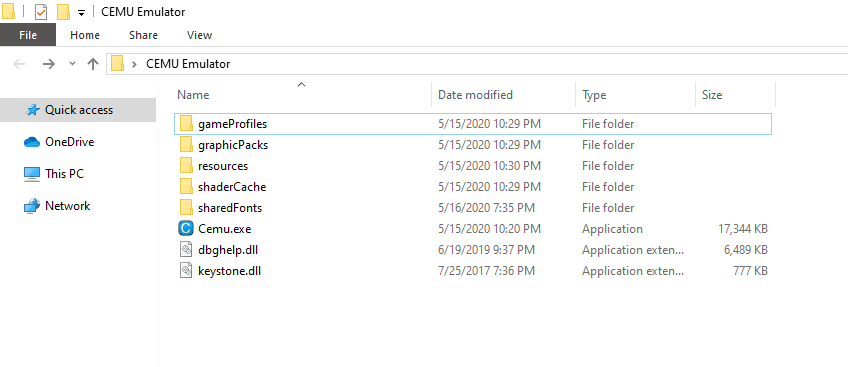
- Copy the contents from the cemu_1.19.0 into the main CEMU Folder, and it should look like this.

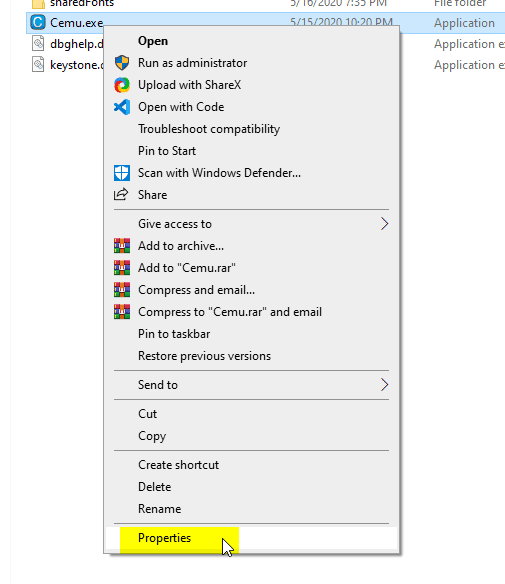
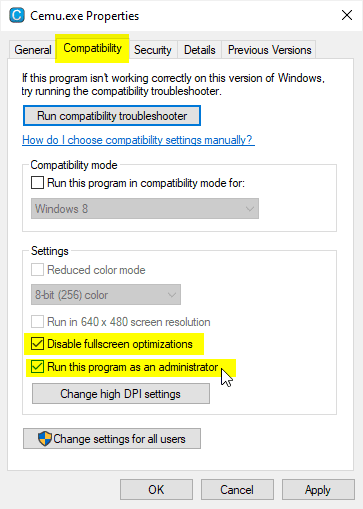
- Now, right click on Cemu.exe and go to properties

- Click on the Compatability tab, and make sure you have checked both “Disable Full Screen Optimizations” and “Run the program as an administrator”

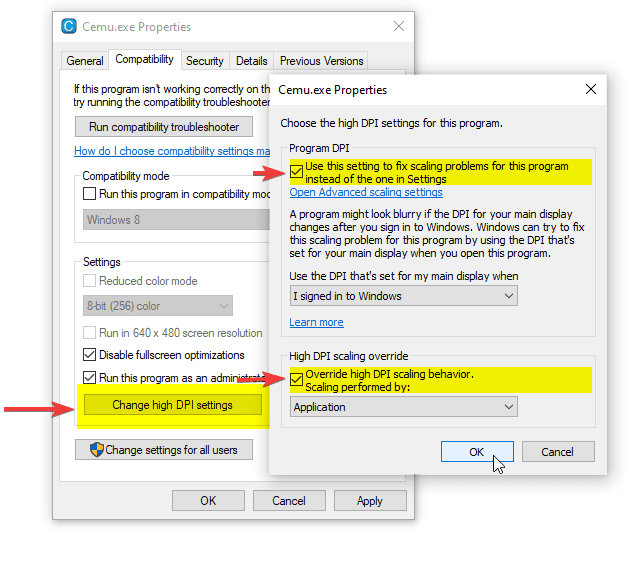
- After this, click on Change High DPI Settings, and check the following options shown in the image below

Running CEMU.exe
- Now, simply run the CEMU.exe by double-cling it. You will be greeted with this “Getting Started” window.

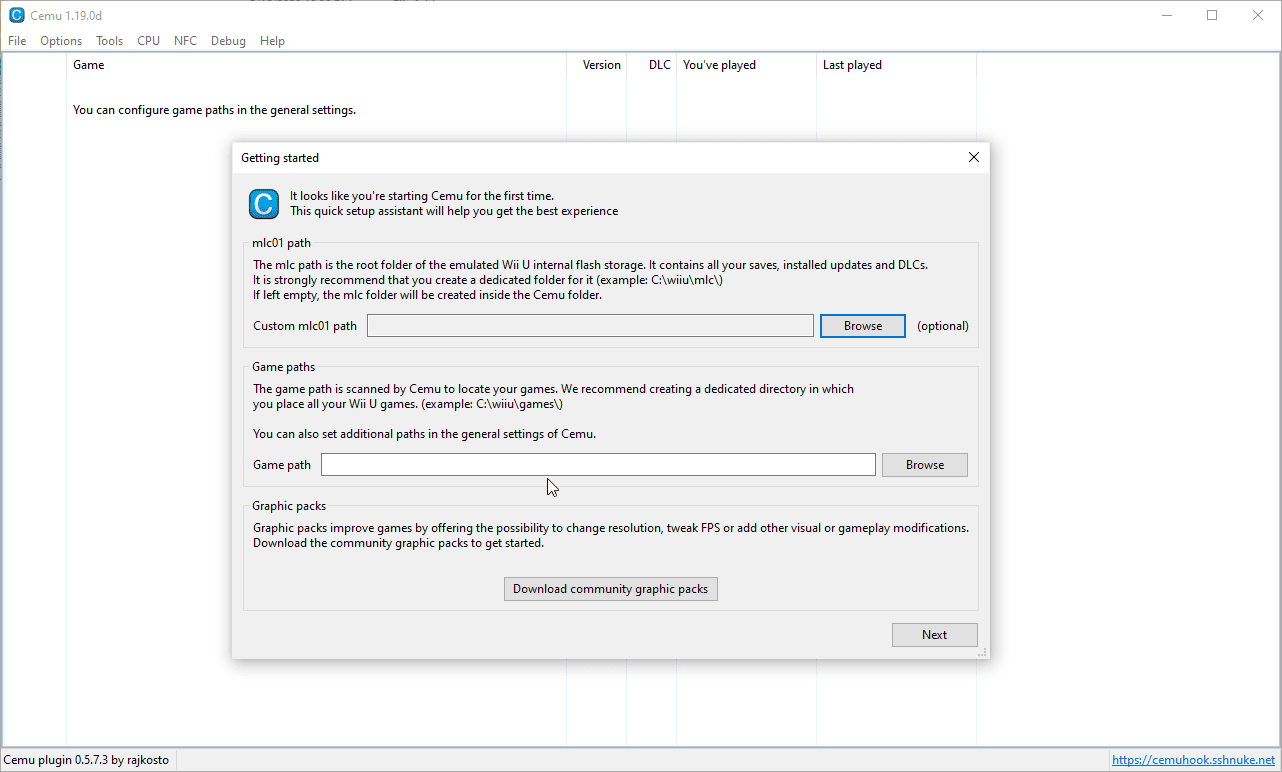
Setting Up mlc01 folder (backup and updates)
- Now, we need to set up our mlc01 and game path folders. Click on browse next to the mlc01 as shown in the image below

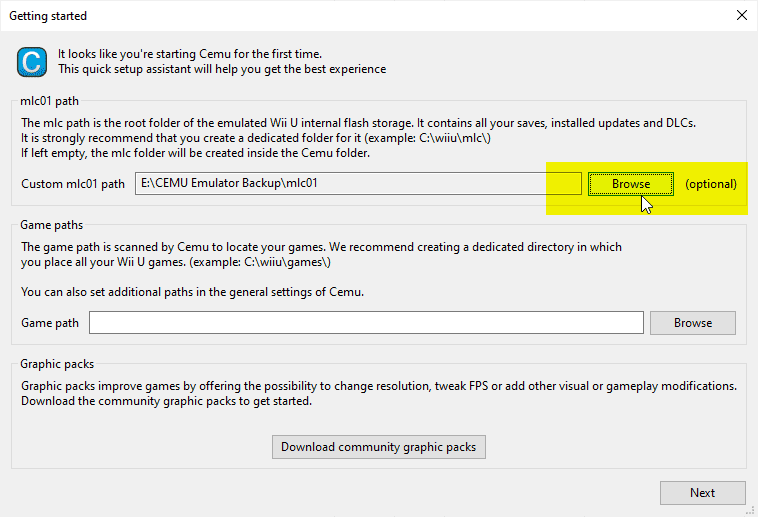
- Now, select one of your drives that has a lot of storage, and make a folder called CEMU Emulator Backup.

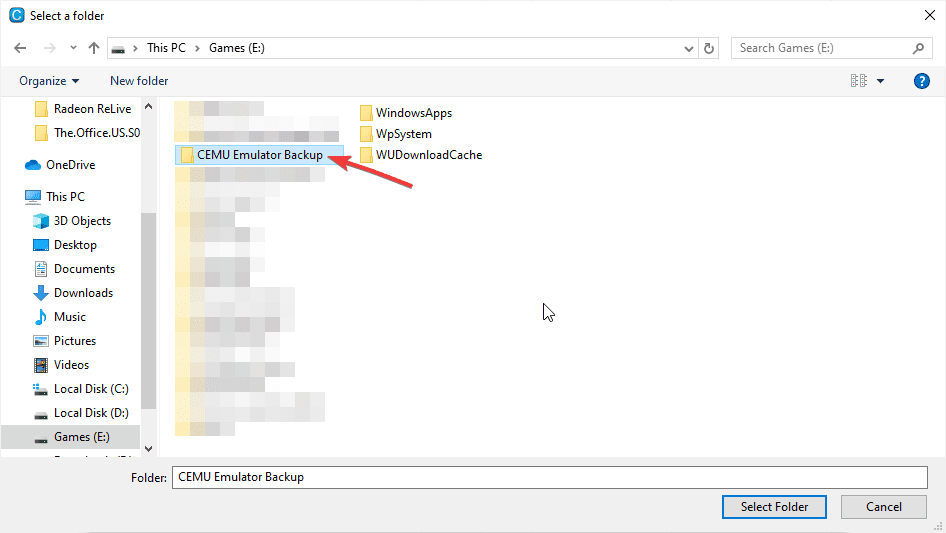
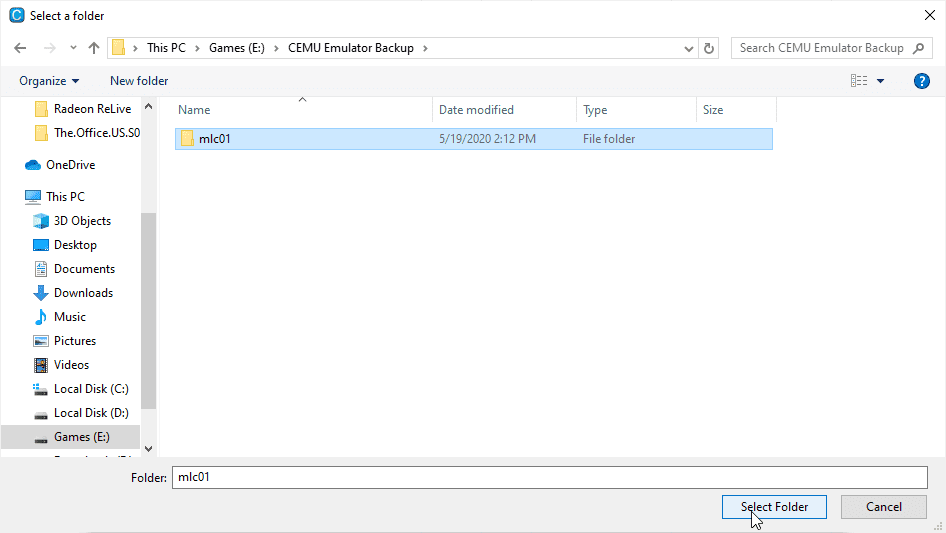
- Inside this folder, create another folder called mlc01. Highlight it and select it as shown below.
Setting Up Games Path
- In the same way, click on browse, as shown below
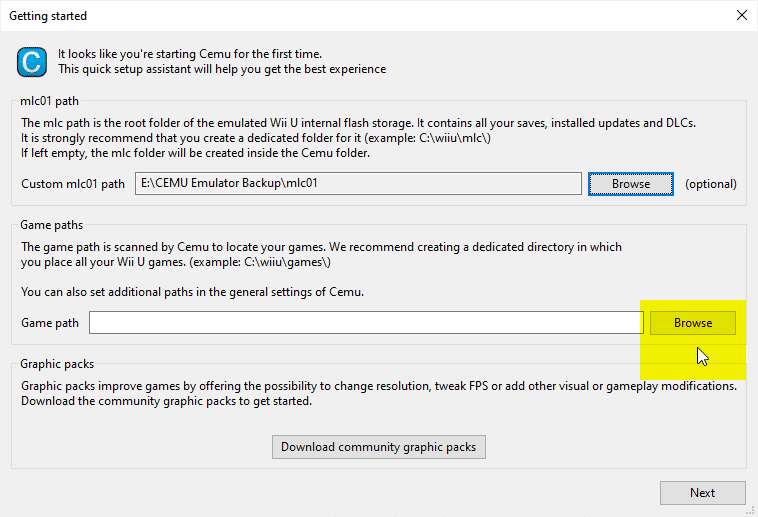
- Navigate to where your Wii U games are stored. Highlight the folder and select it. Make sure you click the folder containing all the games, instead of individual folders of games.

Download Community Graphics Packs and Automatic Updates
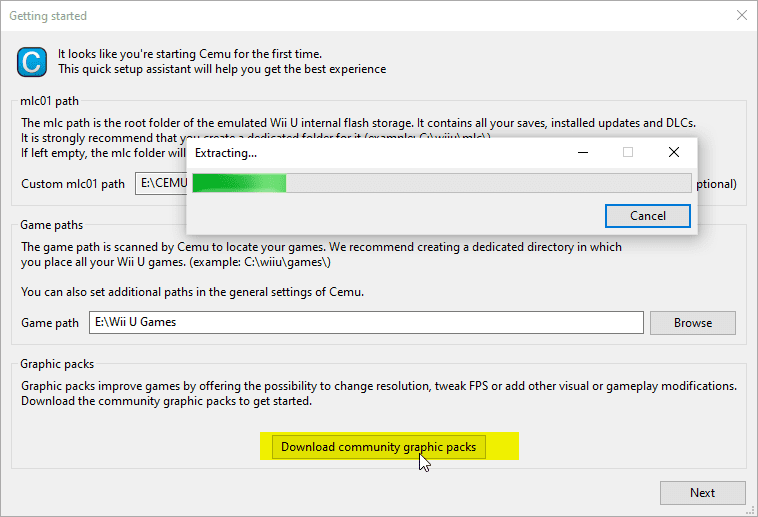
- After you are done with setting up the mlc01 and Games Path folders, click on Download Community Graphics Packs. This will download, and extract the latest available packs for your games.
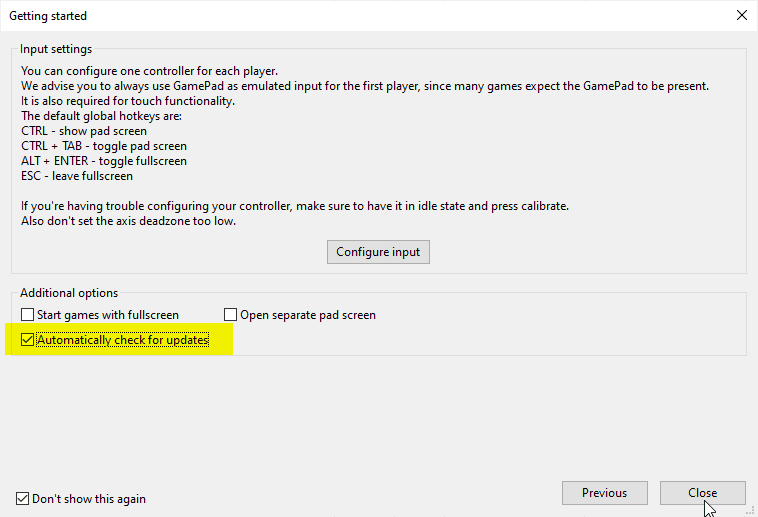
- Click Next, and in this Window, just check “Automatically Check for Updates” and click Close.
Setting up Vulkan API (AMD and NVIDIA Users)
Setting up the API for your specific GPU is very important, and if you are using an AMD GPU, we recommend Vulkan. This also works for Nvidia GPU users, that have 4 GB+ VRAM. If you have a weaker GPU, keep using OpenGL. To set this up, follow the steps below.
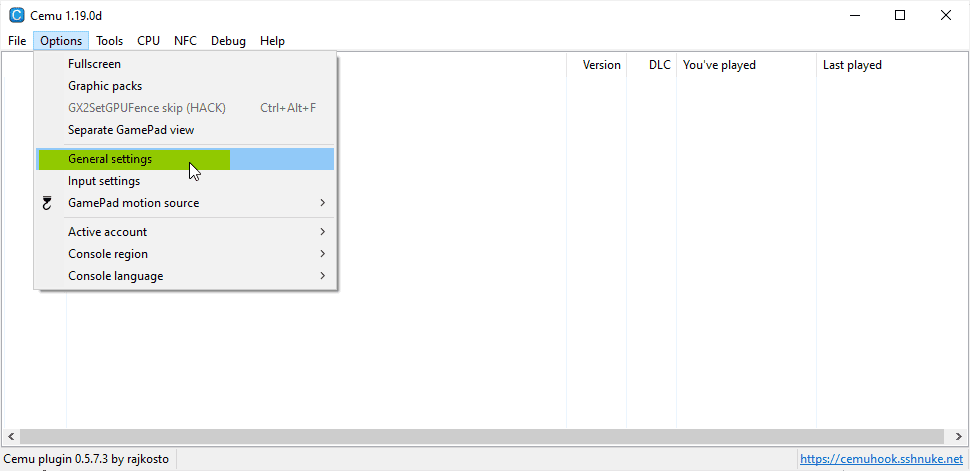
- In CEMU, click on Options, and then General Options

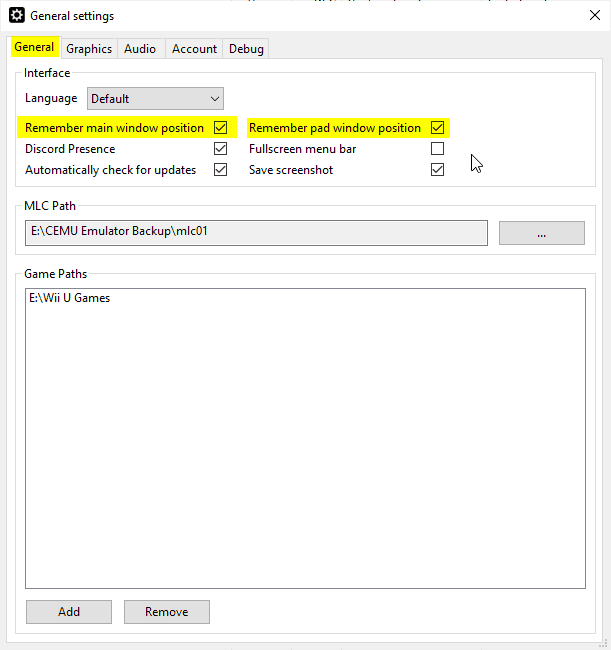
- In the General tab, you want to check the following highlighted settings.

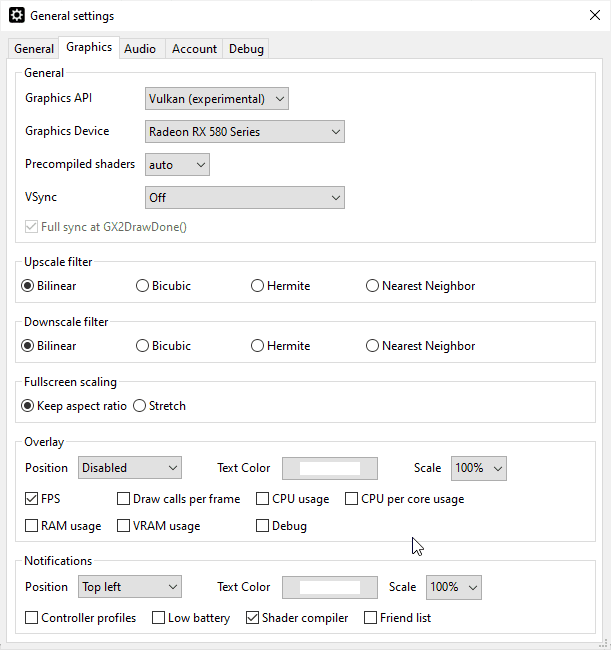
- Now, let’s move to the Graphics tab. Again, if you are using an AMD GPU, make sure you copy the settings we have shared below, and use them. This also works for NVIDIA GPUs that have VRAM of 4 GB or more.
Audio Settings
This is another important section, as we want to make sure users can get the possible audio for their sound configurations.
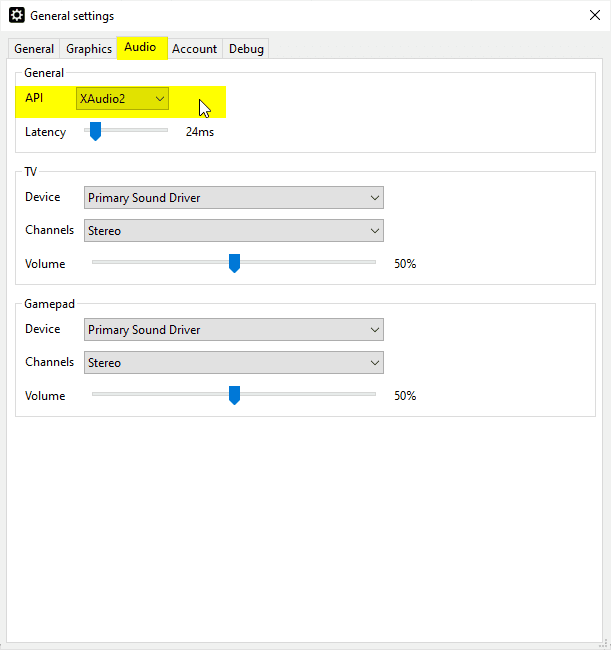
- In the General Options window, click on the Audio tab. Make sure to turn the API from DirectSound to XAudio2.
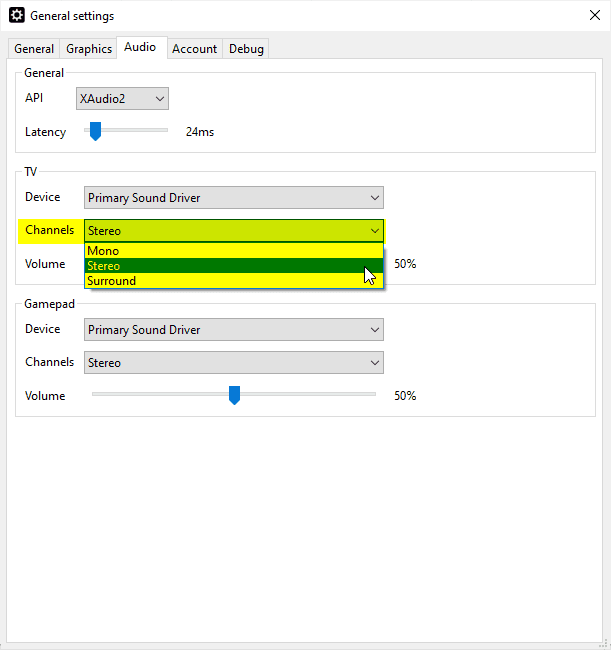
- Now, under TV, select your audio channel. If you are using a Stereo sound system leave it at Stereo, and if you have a 5.1/7.1 surround system, leave it at surround.
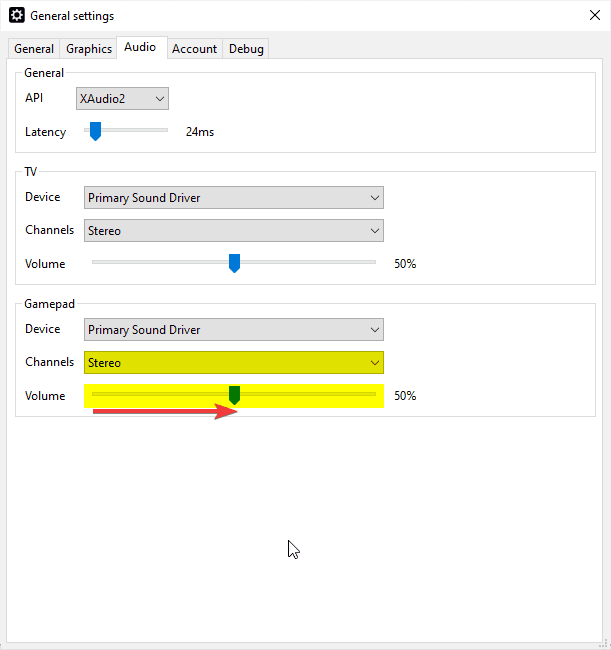
- Under Gamepad, set the channel to Stereo, and increase the volume to 50% at least. It is 0 by default.
Account Settings
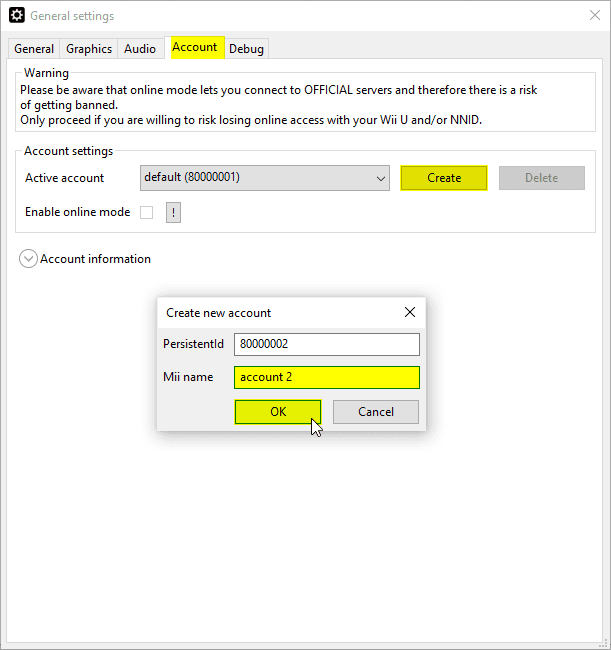
If there are multiple users accessing CEMU, they can set up their own accounts, settings, and save files as well. To do this, head over to the Account Tab in the General Options window.
- Under the Account tab, you can create a new account by clicking the Create button.
This is how you can setup CEMU 1.19.0d on PC. We will be making more guides to further optimize CEMU to it’s fullest potential.
What do you think about this guide? Let us know in the comments below and share your thoughts.